Blog Posts tagged Featured

Creating the Escher Cardigan design was kind of an adventure for me. When I finally finished, I felt like I had created a masterpiece–or maybe I was just feeling a little woozy from relearning all the high school trigonometry required to grade out this pattern. Whatever the case, the unusual shape of the garment was definitely exciting uncharted territory. I had to knit, and then reknit, almost every section until I got it just right.

Escher Picture 1

Escher Picture 2

Escher Picture 3

My initial design sketch actually looks pretty similar to the end result, but the way it all came together differs a lot from my original idea. The most striking difference is that bold V-shape I added to the back. After knitting the whole body section according to my original proposed idea, I tried it on and realized the fit would be much improved if the arm holes angled down a bit. I went back to the drawing board and came up with this solution. It was a real doozy to figure out, but well worth the effort.

Escher Picture 4

Before Brooklyn Tweed assigned this cardigan an official name, I affectionately nicknamed it the #blobsweater because of the somewhat amorphous appearance of my original design sketch. But as the design progressed, “Blob" seemed less and less appropriate. Like when I added the V-stripe, I kept seeing all these wonderful opportunities to incorporate unusual shaping details. By the end, all the missteps, self-doubt and subsequent recalculation had transformed my blob into an elegant, flattering garment suitable for a fancy lady….

Escher Picture 5

… like this one. I think it should be noted, that this model is probably pretty tall and broad shouldered. I never met her, but I think I'm at liberty to make a reliable guess. If you're anywhere near average height, Escher will probably look more like my design sketch on you, falling somewhere around or just below your elbows. I'm about 5'10", and this is what the exact same sweater looks like on me:

Escher Picture 6

One of my favorite details in Escher is the shaping in the ribbed edging around the shoulders on the back. The shaping mirrors the bold V-stripe on the back. This shaping helped refine the fit but also visually balances the design. This was definitely not in my original plan, but I just couldn't help myself. Its little details like this that make my little designer heart flutter.

Escher Picture 7

One of my goals with this design was to make it entirely seamless. This created a few challenges for me. The biggest problem was in the rib section, because if I worked it in one long round, it would require a mind-blowing number of stitches on the needle. I have no desire to keep track of 600+ stitches, and I don't expect anyone else to find joy in that either.

After much experimentation, I figured out that I could construct the edging in two flat pieces, and still keep the cardigan seamless. The lower part is formed from picked up stitches that are worked straight out from the body. Then the upper section is formed from stitches that are picked up from the body and the sides of the lower ribbing section.

Escher Picture 8

Another little thing you may not have noticed is the knitted covered button that I made for this cardigan. If you recall my Knitted Covered Button Tutorial post I did last year, you know how much I love this technique.

Escher Picture 9

I love how the button just looks like it belongs–a compliment to the design instead of a distracting focal point. Unfortunately, Brooklyn Tweed didn't get a photo of the cardigan buttoned, so I feel like it's my duty to shout about this detail from the rooftops! YES, it buttons and it's adorable! Button! B-U-T-T-O-N!

Escher Picture 10

This was my fourth Brooklyn Tweed “Wool People" contribution, and the third design I've done with their Loft yarn. The fact that I keep going back to this yarn is a testament to how great it is. I hope you'll pick some up and knit yourself an Escher too. I can hardly wait to get the sample back. It's sure to be one of my signature pieces and a much loved wardrobe staple!

Rook was the third pattern I wrote for my book, Graphic Knits. I chose the lovely Blue Sky Alpacas "Alpaca Silk" yarn for this design because it comes in such a fantastic palette of colors. As soon as the yarn arrived, I could hardly wait to get started on this design.

Rook is one of my very favorite patterns in the book, but it probably gave me the most trouble design-wise. It was a little bit of a nightmare, actually. I started work on this pattern as Hurricane Sandy approached New York City in October 2012, and didn't finish until four months later at the end of February 2013. To put that in perspective, I was trying to design, and knit about 1½ to 2 new things every single month to make the seemingly impossible August 2013 deadline I had for my book.

I had a grand vision for Rook. I would invent a new shoulder construction just for this design–my very own method for a top-down seamless sweater with a simultaneous set-in sleeve cap. It's a lot of fun to knit, but boy it was a doozy to figure out!

Of course, I rarely get anything right on my first try, and this new shoulder construction was no exception. I knitted the whole body of the sweater, and half a sleeve before I realized that my original design had some serious problems. The armsyce was just too long and the top of the cap was strangely boxy. The long armsyce introduced a whole heap of other issues that I won't even bore you with.

It was clear I had to start over. I knew the concept had great potential but my time limitations were forcing me to consider scrapping the whole design. I was so sad, because I thought it was one of the very best designs in my whole book proposal.

After taking a little (two month) break from the project, I decided to give it another try. I refigured the math for the sleeve cap and got to work re-knitting the top portion of the sweater. Version 2 was everything I hoped it would be! An all around perfect fit.

Thankfully, most of the color-work in the lower portion of the sweater could be salvaged, but I would have to graft it by hand to the new top–not an easy task! And lucky you, I documented the whole thing, for your future blog reading delight.

The graft became 100% invisible after I blocked the sweater. Since the new shoulder section was shorter by a couple of inches, I was able to add a little more of that lovely Fair Isle pattern to the bottom, which made me really happy.

I think I look a little triumphant in that picture. What do you think?!

Of course making the decision to rip out weeks of work is not easy, but I've never regretted it once. It was my expectation that as I became a more experienced designer, that there would be many fewer of these kinds of harrowing experiences, but that is just not the case. In fact, I start over on things much more than I used to. I think I hold myself to an ever-higher standard, because I know that every new design can be a masterpiece. It might not look like a Rembrandt, but completing Rook was one of my proudest moments.

For more information about the design, check out the pattern page here.

Recently, I needed a button for a new cardigan I knitted for an upcoming Brooklyn Tweed Wool People collection (sorry, no pictures allowed yet). The button needed to be sort of plain, because the design is very clean and modern, but also compliment the warm coziness of the BT Loft yarn I used. Of course, I have some of the very best button stores at my disposal here in NYC, but why bother when I have the power to make the perfect button, right here in my living room?!

KnitDarling-Knitted-Covered-Button1

If you've never made covered buttons before, you've been missing out. It's kind of amazing because they open up a whole new world of interesting button possibilities--including of course, hand-knitted buttons.

Covered buttons are especially great for using with lightweight hand knits that require larger buttons. Big heavy buttons can pull on delicate hand knits and distort them over time. I learned this the hard way, of course, so I'm very sensitive to gravity's effects. Covered buttons are pretty much hollow, making them more lightweight than standard plastic buttons. This is exactly what I needed for my BT cardigan.

As I created my buttons, I thought this is just the kind of thing my Knit Darling readers would love to learn about! I’ve made a great number of covered buttons over the years, so I have a lot of knowledge I can share. Before I get into the instructions though, I have a few things you should consider.

KnitDarling-Knitted-Covered-Button2

ONE
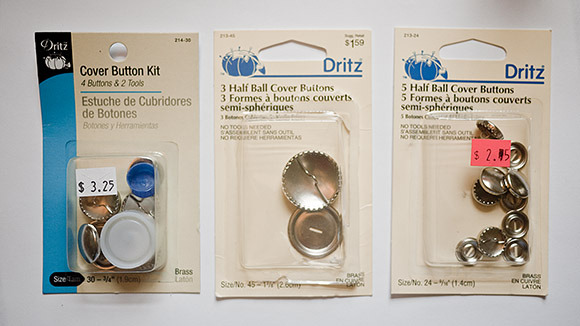
I’ve never successfully made a tiny knitted covered button. Because of this, I suggest you use a medium to large sized covered button kit. I like to use the kind of covered buttons that feature comb-like teeth on the underside because they are perfect for grabbing the edges of knitted fabric. I've used Dritz brand half-ball covered button kits with great results.

TWO
Select a very lightweight yarn–fingering weight works best. Most covered button kits are designed to be used with thin woven fabrics. Thicker yarn doesn't work because it prevents the back plate from snapping into place properly.

KnitDarling-Knitted-Covered-Button3

THREE
Use a smaller needle than suggested to create a very dense fabric. This is more of an aesthetic thing. The piece of fabric you knit has to stretch over the shiny metal button, and any little gaps between your stitches will become very obvious. I always use size 0 needles.

FOUR
Contrary to the kit instructions, make your knitted piece only barely larger than the button itself. This will reduce bulk inside the button, which will make snapping the cover into place much easier. Again, the kits are designed to be used with woven fabrics that fray near the cut edges. We won't have that problem with our custom made knitted covers, so ignore the pattern on the back if the package.

KnitDarling-Knitted-Covered-Button4

INSTRUCTIONS
You will be making a little octagon that is just big enough to wrap around the top if the button. You might like to measure the button to determine this size, but I've also done pretty well just estimating it as I go.

Cast-on about 4-8 stitches, depending on the size of your button (about 1/3 the width of the button). Begin knitting the piece in whatever stitch you like, and cast-on one extra stitch at the end of every single row until the piece becomes a little wider than the button itself. At this point, it should be about 1/3 of the total length that you need. Now, knit straight without shaping until the piece is about 2/3 of the total length that you need. Then, begin decreasing one stitch at the beginning of every row until the piece is the right length and bind-off.

KnitDarling-Knitted-Covered-Button5

ASSEMBLE THE BUTTON
Look at your knitted piece and determine if the fabric is dense enough to hide the shiny button to your liking. If not, it's okay to paint the button with a matching color (use nail polish, acrylic paint, or enamel spray paint).

KnitDarling-Knitted-Covered-Button6

Now, place the knitted fabric with the right-side facing down on a table. Position the top of the button, rounded side down over the fabric. Pull a bit of the fabric around to the back so it catches in the teeth. Take a bit of fabric from the opposite edge and stretch it so it catches on the teeth on the other side. You want the fabric to be tight across the top of the button, but not stressed, if that makes sense. Make adjustments to center the fabric now, because it becomes practically impossible later.

KnitDarling-Knitted-Covered-Button7

Continue attaching small bits of fabric from opposite sides until the fabric is completely secured. Trim the ends about 1/8" from the fabric.

Then, the only thing left to do is snap the back cover plate into place. Refer to the package to see which side is "up" on the back plate. This maneuver is always a little tricky, and occasionally I find it necessary to employ a hammer, but usually I can just use the edge of a table to press the plate into place.

KnitDarling-Knitted-Covered-Button8

Of course, there are lots of opportunities to get creative with your covered buttons. Try different stitch patterns or stripes. I think it could also look cool to paint the button cover a contrasting color, and let that show through a lace stitch pattern.

KnitDarling-Knitted-Covered-Button9

Do you have any cool ideas, or maybe some tips of your own? Please share in the comments section below!


weaving-in-ends-header


Below are 5 tips for weaving in ends on your hand knits that are beyond a simple "how-to"  (here's my "how-to" video, if you're looking for that). Everyone does it a little differently, and there are probably 100 different techniques. My favorite way is to thread the end onto a yarn needle and use the duplicate stitch on the wrong-side, but obviously there are many variables that effect the way I do this and contribute to the success of the outcome.
weaving-in-ends-01


1. Do a little planning. With garments that involve seaming, you can easily hide ends in the selvage, stitching up along the edge then backstitching a little to secure the end. For this reason, it's best to join new yarn at the beginning of a row. Try to pay attention to the amount of yarn that is left as you begin each new row. Also, if you will be sewing a seam, you can strategically place a very long end and use it for seaming, which eliminates two extra ends, and leads to the next tip.

2. Leave long tails. whether it's at the beginning middle or end of a row, you always want to leave enough of a tail to thread one of those giant yarn needles, plus a few extra inches. 8 inches is usually enough. Use your long tails to attach embellishments, sew seams or for closing the top of a hat.

3. Block your knits after weaving to smooth everything out.  It's not always easy to weave ends into smooth fabric textures. Some of your stitches might end up looking a bit distorted but a little blocking can work wonders. Wet-blocking will yield the best results. I cannot stress the importance of blocking enough.

4. Split plies for bulky yarn. This is one of my favorite tips. If you are using a bulky weight yarn, it can be difficult to hide your ends. If your yarn is plied, you can split the plies apart and weave them in separately. Similarly, you can grade, or taper the yarn as you weave it, trimming the plies as you go.
Splitting Plies of Thick Yarn

5. Fake the duplicate stitch by doubling your yarn when you join a new
ball. This is a great time saving technique for finer yarns, and especially useful when working in the round. When you have about 10" left on your ball of yarn, join the new ball leaving about a 6" tail. Work 8 stitches holding the old and new yarn together, then drop the old yarn and continue the round (drop the ends on the backside). On the next row, work the doubled stitches normally. When it comes time to weave in these ends, all you need to do is trim them close. For extra security, I usually run the tail through a few purl bumps to keep the ends from creeping out on the right side.

BONUS TIP: SPLICING
Sometimes it is possible to avoid weaving in ends by splicing the ends of two strands together. This works best with especially fuzzy yarns that are able to felt.
weaving-in-ends-02


TO KNOT, OR NOT TO KNOT
Someone recently asked me why they shouldn't just tie a knot, trim the ends, and call it a day.

Knots aren't terrible, but they don't always stay tied and can be uncomfortable to the wearer. Also, they have a tendency to float to the right side. Knitted fabric can be very fluid, especially if you're using slippery yarn.  Over time, the knot can pull and distort the stitches around it. If you weave in your ends, a knot is totally unnecessary.

SPECIAL CASES
Cotton yarn- It's especially difficult to hide the ends of cotton yarn, but you can almost always split the plies as in tip #4 and get a nice looking result.
Chunky Single ply yarn- You might still be able to divide the ply in two, but if not, you can weave the end in tightly, trim the end at a long angle to taper it, and then stretch the fabric to pull the end into the stitches. Some people actually secure the ends of very chunky yarn with sewing thread and a sharp needle. I've never had cause to try this, but it's worth mentioning.

Do you have any little tricks you’ve picked up along the way? I’d love to hear them in the comments below.

This is part of my ongoing “5 tips” series. Future topics will be swatches, and substituting yarn, and reading a pattern. Please let me if there is another topic you would like to see me write about.

The simplest definition of "blocking" is the application of moisture to your hand knits to effect some kind of change. The process might also include heat, steaming, and stretching, but at the core, it's just wetting then drying. The most important thing to know is that blocking will often result in a change of gauge and a smoother fabric texture.

Below are 5 tips that might not be obvious if you're new to the block (pun absolutely intended)
Five tips for blocking your hand knits from Knitdarling.com
1. Block your swatches the same way you block your finished thing. Write down the gauge measurements before and after to establish a working gauge. This lets you know if you're on track as you knit your garment. I also like to use small swatches to try out different blocking techniques. If you're knitting with a superwash yarn, and you intend to wash and dry your finished thing in a machine, no blocking is necessary, but you should absolutely wash and dry your swatch to determine the correct gauge for your pattern.

2. Wait until its totally, completely, bone dry. If you try on a garment before its dry, you might accidentally stretch it out or deform all the shaping you did in the blocking process. Blocking sort of locks the stitches into place, but not until all the moisture evaporates.

3. Use a fan. Some fibers are very absorbent, and can take forever to dry. It's absolutely legal to speed the process by placing the piece you're blocking in front of a fan.

4. Block to your own measurements. Your knits become very malleable when they are wet. Use this as an opportunity to further tailor your garment. Use pins to shape and stretch areas that could use a little more room.

5. Use different blocking methods for different purposes. I use wet blocking for most everything, but sometimes all you need is a little bit of steam from your iron to get your stitches to lay flat. It's also possible to combine the two methods if you really want to stretch out your stitches, like maybe for a lacy shawl. Applying a little extra steam to something that you are wet-blocking seams to lock the stitches into place better. It should be noted that applying steam or heat to your fabric will drastically reduce it's elasticity, and shouldn't be used on areas like ribbing. If you never intend to wash your finished thing, a light spritzing of water from a spray-bottle and a few pins might be just the ticket.

Do you have any little tricks you've picked up along the way? I'd love to hear them in the comments below.

This is part of my ongoing "5 tips" series. Future topics will be weaving-in ends, swatches, and substituting yarn. I would love to know if there is another topic you would like to see me write about.

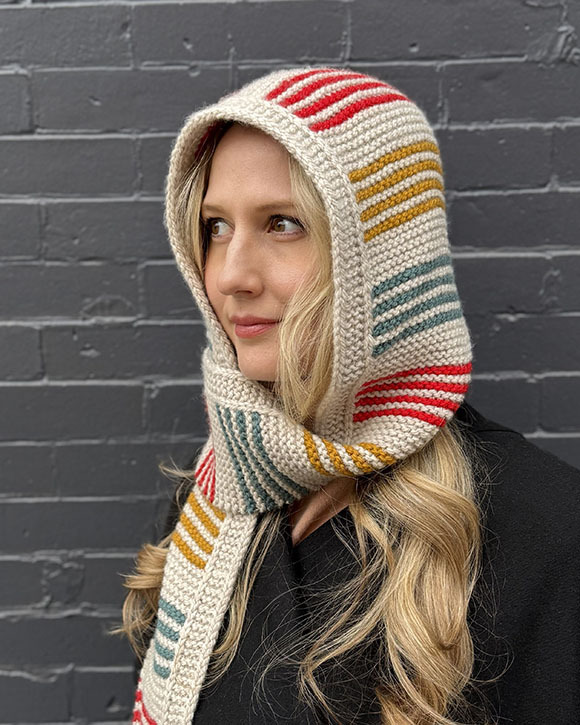
I'm excited to finally share Chromia Hood, a new knitting pattern pattern that I designed for Quince & Co. that officially launched this weekend in conjunction with Vogue Knitting Live. The sample and the pattern made their debut on the VKL show floor, which still feels a little surreal (more on that below!)

This design has been bouncing around my head for QUITE a while (turns out, motherhood is no joke!) The concept started as something much bigger and more complicated before it found its right form in this fun little accessory.


From an Unfinished Idea to a Finished Pattern

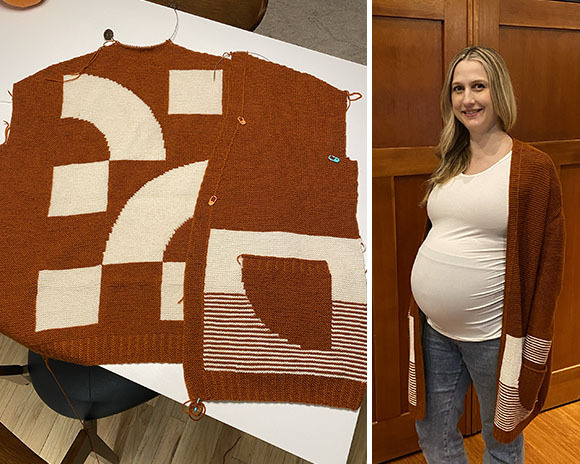
Many of the details in Chromia Hood were first explored in a different design I worked on more than a year ago. That earlier piece was a cardigan featuring similar intarsia stripes and border treatments, but on a much smaller scale and with far more complexity.

As the cardigan design progressed, it became clear that it was probably never going to be published. It relied on a lot of advanced techniques and leaned heavily into an artsy, experimental space, which meant the audience for it would likely be quite small. Around the same time, I was also extremely pregnant (as you can see in the pic below) with my second son and heading into the final stretch before Rhinebeck 2024. Between the complexity of the design and the reality of impending newborn life, it simply was not a project I had the time or energy to push across the finish line.

Even so, I loved many of the details.

The graphic intarsia stripes on garter stitch, the combination of i cord and slipped stitch edging, and the overall visual language of the piece stayed with me.

When Quince & Co. later reached out with a request for accessory designs, I immediately thought back to that cardigan. Accessories felt like the perfect place to revisit those ideas in a more focused, approachable way. Chromia Hood grew directly out of that moment.


Color and Detail

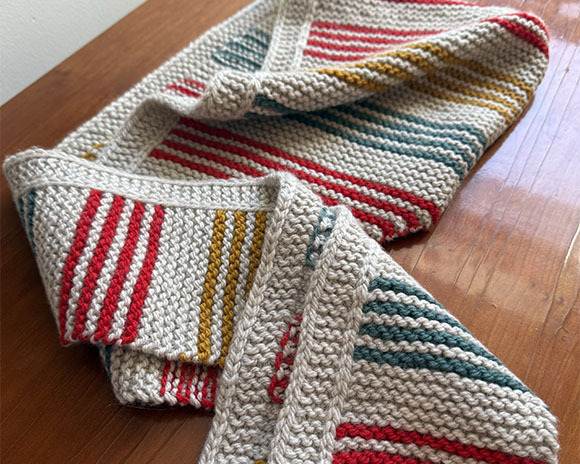
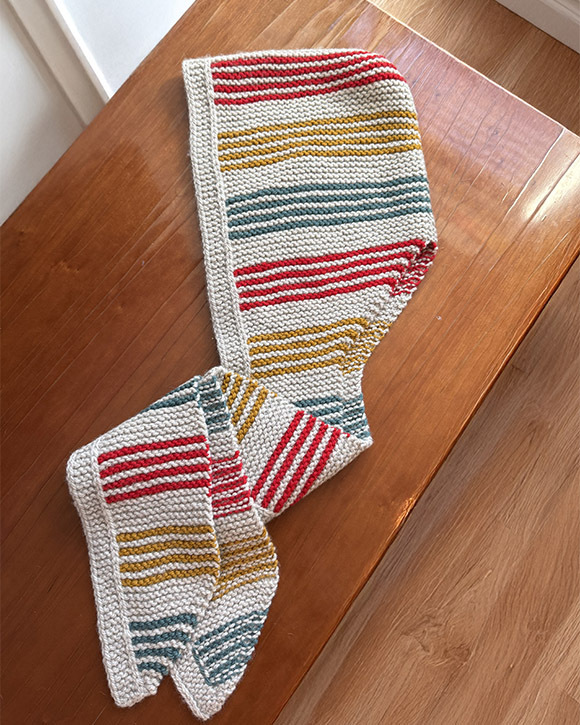
The bold striped sections in Chromia Hood are worked using a basic, approachable intarsia technique. Because the stripes are straight and regular, the color changes are very easy to manage.

Along the edges, a built in i-cord pairs with a subtle slipped stitch border. These small details frame the piece and give it a polished finish, without overwhelming the simplicity of the overall fabric.

I describe all of these techniques and more in a technique tutorial video which you can see below (also linked in the pattern).


The Yarn

Chromia Hood is knit in Osprey by Quince & Co., an aran-weight yarn spun from 100% American wool. Osprey has a beautiful balance of structure and softness. It is plush and squishy in the hand, with enough body to hold the graphic stripes and hood shape, but soft enough to wear comfortably against the neck and face.

Despite being a woolen yarn, it is not itchy at all, which was especially important for a piece designed to sit so close to the skin. It is a real pleasure to work with on the needles, and the generous color palette made it easy to find a combination that felt bold, graphic, and still very wearable.

If you are substituting yarn, look for an aran-weight wool with good loft and elasticity so the garter stitch fabric stays cushy and the hood keeps its shape.


Construction, Speed, and Difficulty

Chromia Hood is worked flat in one piece from tip to tip, then folded and seamed at the back of the head to form the hood. The shaping is created with straightforward increases and decreases, which make the knitting intuitive and easy to follow.

Knit on US 10 needles with aran weight yarn, this is a fast project. It is especially well suited to confident beginners or intermediate knitters who want to try intarsia in a low pressure way, without committing to a large or highly technical garment. The chunky gauge, garter stitch fabric, and rhythmic color changes make it a satisfying knit that moves quickly while still staying engaging. For knitters looking for something that feels substantial but does not require weeks of commitment, this project hits that sweet spot. You could probably knock this out over a couple of weekends.


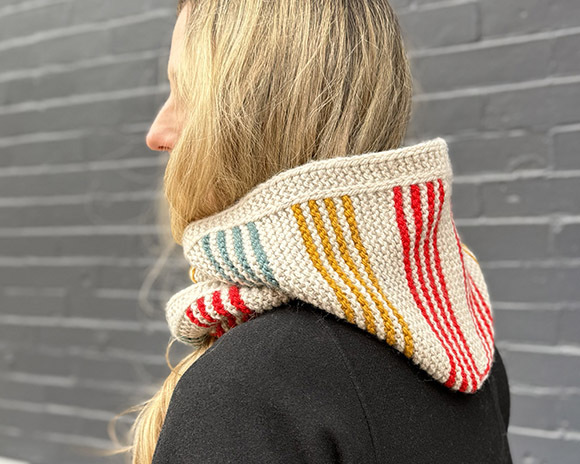
A Hat, a Scarf, or Something In Between

This is not my first hood, and it is certainly not my first scarf, but it is my first "hooded scarf" to design. As an accessory category, hooded scarves seem to have really surfaced over the past few years, though I'm sure they're not actually new.

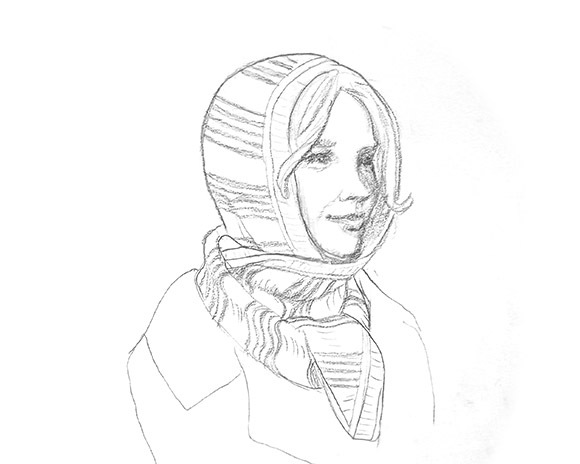
There is something a little old world about them. They bring to mind practical layers worn by grandmothers, or perhaps something that might frame a perfectly set 1960s bouffant. At the same time, they feel very current. Comfortable, unfussy, and quietly confident.

I think we can thank Gen Z for helping push this kind of accessory back into the spotlight. Their embrace of comfort, warmth, and function over trend driven impracticality has made space for pieces like this again. For that, I am deeply grateful. Especially for the rejection of ankle socks. Gen Z, please also take a look at leg-warmers. It's time! And, I have some ideas...

At its core, Chromia Hood is about flexibility. It offers the warmth and coverage of a hat when you need it, but behaves like a scarf the rest of the time. Easy to pull on and off, comfortable indoors, and adaptable to different ways of wearing. When it came time to categorize it on my site, there wasn't a perfect fit. In the end, I chose Hat, even though the piece happily resists a single label.


Launching with Quince & Co. at Vogue Knitting Live

Releasing this pattern in partnership with Quince & Co. and debuting it at Vogue Knitting Live has been incredibly special. The sample was displayed in the Quince & Co. booth, and the pattern was part of a show giveaway, which made the launch feel communal and celebratory.

I am deeply grateful to Quince & Co. for their support throughout this process, and to everyone who stopped by the booth.


The Pattern

Chromia Hood is available now here on my website, through my Ravelry shop, on Payhip, and at Quince & Co so you can get started right away. I can't wait to see how knitters make it their own, whether that means bold contrast or a quieter, more subtle palette.

You can find the full pattern and materials list via the links above. Also, I'd love for you to find me on Instagram and tell me what you think!

As always, thank you for knitting along with me.

I love a knitting technique that delivers a beautiful result without a lot of fuss. The alternating cable cast-on and bind-off are two of my favorites for exactly that reason.

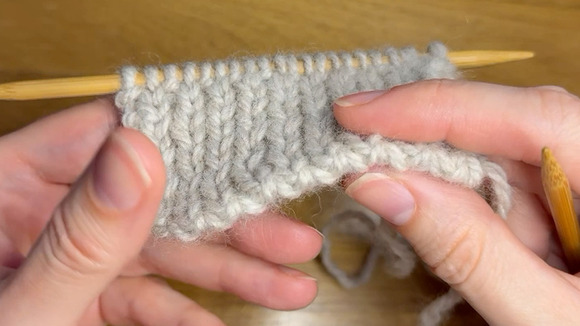
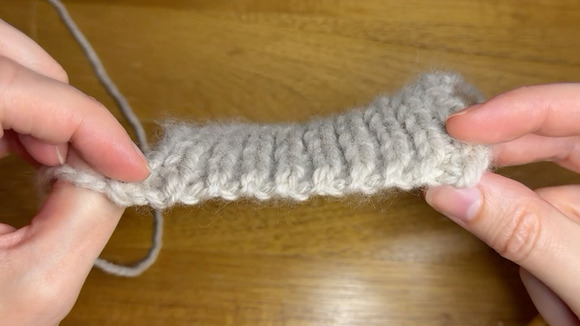
Both create a neat, almost invisible edge that follows the natural structure of 1×1 ribbing. The knit and purl columns seem to wrap around the edge of the fabric, giving it a polished finish similar in appearance to a tubular (Italian) cast-on or bind-off, but with far fewer steps.

They also have a nice balance of stretch and structure, making them particularly lovely for sweater cuffs, necklines, and hat brims. They work with both regular and twisted ribbing, too.

knitted swatch showing examples of both the Alternating Cable Cast On and Alternating Cable Bind Off

Alternating Cable Cast-On

The alternating cable cast-on is worked much like a traditional cable cast-on, except that you alternate between forming knit and purl stitches. There's also a small twist added to each stitch as it's transferred to the left needle, which is optional (more on that below).

Watch the video above for a step-by-step visual tutorial.

How to work it

Setup: Make a slip knot on the left needle (counts as a purl stitch). Knit into the slip knot without dropping it, then transfer the new stitch to the left needle by inserting the left needle into its front leg from right to left, twisting the stitch.

Purl cast-on: Insert the right needle between the first two stitches on the left needle, from back to front. Wrap the yarn and pull through a loop. Transfer the new stitch to the left needle with the same twisting motion.

Knit cast-on: Insert the right needle between the first two stitches, from front to back. Wrap the yarn and pull through a loop. Transfer the new stitch to the left needle, twisting as before.

Repeat the purl and knit cast-on stitches until you have the desired number.

knitted example swatch showing the edge of the alternating cable cast on technique

Tips for a beautiful finish

It's easy to lose track of the sequence, so check your stitches every 10–20 stitches. The knit stitches sit forward, while the purl stitches recede slightly.

If you lose your place, look at the working yarn: if it emerges from the back of the last stitch, cast on a purl next. If it emerges from the front, cast on a knit. You can see this demonstrated at 6:02 in the video.

Working in the round? For a cleaner join, work one row of 1×1 ribbing flat before joining. When weaving in your cast-on tail, use it to close the small gap, mimicking the path of the neighboring stitches. This finishing technique is demonstrated at 8:13.

Why twist the stitches? When you transfer the newly cast-on stitch from the right to the left needle, these instructions include a little twist. However, you may transfer the stitch without a twist. I've tried it both ways, and while the end results appear almost identical, I prefer the twisted version. It looks slightly rounder, feels more stable as I'm working it, and seems to spring back into shape a little better after being stretched.

Alternating Cable Bind-Off

The matching alternating cable bind-off creates a similarly tidy edge, with the knit columns extending right up to the edge and appearing to curl around to the back.

The trick is to purl the knit stitches and knit the purl stitches, while wrapping the working yarn around the base of the previous stitch rather than moving it directly between the needle tips.

I demonstrate two methods in the video below. Both produce the same result.

Method 1: Wrap Around the Needle

This method is easier to understand at first, but requires a straight or double-pointed needle in the right hand. Throughout the bind-off, you'll knit the purls and purl the knits, as if working seed stitch.

  1. Work the opposite of the first stitch presented (knit a purl, or purl a knit).

  2. To prepare for the next stitch, move the working yarn around to the opposite side by wrapping it around the right side of the stitch just worked and under the right-hand needle, instead of between the needle tips.

  3. Work the next stitch in the opposite pattern as a seed stitch and pass the previous stitch over to bind off.

  4. Continue across the row.

Watch the demonstration at 1:21.

Method 2: Slip, Switch, Slip

This is my preferred method because it has a much smoother rhythm. It's also well suited to circular needles and continental knitting. Set up by working the first stitch opposite as it presents (purl a knit or knit a purl).

  1. Slip: Return the stitch on the right needle to the left needle.

  2. Switch: Move the working yarn between the needle tips to prepare for the next stitch.

  3. Slip: Return the stitch to the right needle.

  4. Work: Knit the next purl stitch or purl the next knit stitch.

  5. Bind off: Pass the previous stitch over the new stitch.

Repeat: Slip, switch, slip, work, bind off.

Watch the demonstration at 4:18.

A note about stretch

The alternating cable bind-off has a decent amount of stretch, though it isn't the stretchiest bind-off out there—again, similar to the Italian bind-off. What I particularly like is that it has enough structure and spring to keep edges looking neat, rather than loose or sloppy. It's a great choice when you want your ribbing to hold its shape.

A Beautifully Matched Pair

These two techniques look especially lovely together, but they're just as useful individually. The simplest details can make the biggest difference in a finished knitting project, and a thoughtfully chosen edge is one of them.

Give them a try on your next project! If you have any questions, feel free to leave a comment on the YouTube videos, reach out through my website's contact form, or find me on Instagram.

Ladder Back Jacquard, where have you been all my life?

Many of the special hand knitting techniques that I have adopted over the years were discovered through desperate necessity. Late at night, absolutely exasperated and muttering to myself, “There's got to be a better way!" Then turning to Google or YouTube to compose a series of clumsy search queries.

Some of my favorite go-to methods were discovered like this—slip-knot cast on or the icelandic bind-off, for instance. Occasionally, this has lead to me “unventing" something unique, like my method for vertical stranding or 2-row jogless stripes in the round.

I recently found myself in a desperate moment like this while designing a colorwork motif for my new design, the Arquette Pullover. The Fair Isle motif requires a series of very long floats and the good ol' “Catch the Float" method just wasn't cutting it.

Enter, the Ladder Back Jacquard technique—a very cool method for invisibly managing long floats in stranded colorwork. I went on a deep-dive and learned everything I could. And now, I'm going to pass on my learnings in a long and rambling blog post. But if you'd rather just watch the video, this one's for you:


What is the Ladder Back Jacquard Method?

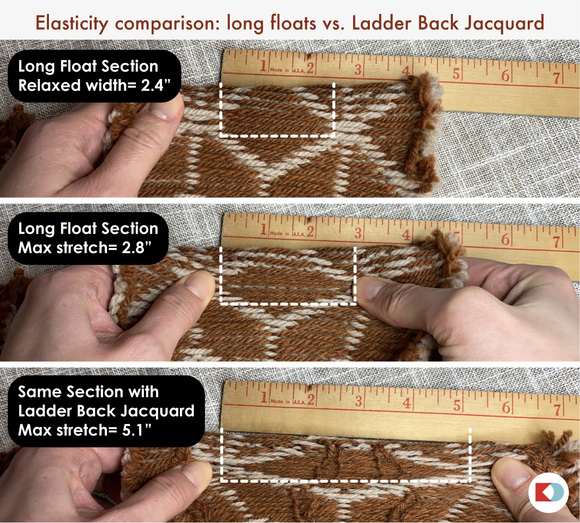
The Ladder Back Jacquard method is used in Fair Isle colorwork knitting to turn a series of long floats into a “ladder" of interlocking stitches on the back side. This neatly secures the floats and gives the piece impressive elasticity.

The term “jacquard" refers to any kind of fabric that has a layer of floats on the back. This method turns those floats into columns of stitches (ladders) that are only visible on the back side—hence, “Ladder Back Jacquard". It's actually a simplified version of double knitting.

Why would you use the Ladder Back Jacquard Method?

There are three related reasons why you would choose the Ladder Back Jacquard method to manage long floats in your color work—elasticity, tension, and stitch distortion.

1. Long floats are more susceptible to getting caught on things like fingers or jewelry. Snags can seriously distort the beautiful design that you've painstakingly knitted.

2. Also, it can be difficult to maintain a loose, even tension when managing long floats. If you aren't careful, your knitting may become tighter and tighter with every progressive row. This will cause puckering in your knitting and make it extremely in-elastic. To even out the puckering, you may have to stretch the floats in blocking which will cause the stitches to distort.

3. The longer your float is, the less elastic your knitting will become. If you need to stretch your knitted garment, like to get it over your head or ankle, you may end up pulling the long floats beyond their natural limit and distorting your motif. I've even heard of people accidentally tearing their colorwork because of this problem.


Ladder Back Jacquard Vs Catching Floats:

There is another much more common technique called “catching a float" or “trapping a float" that addresses some of these same problems, but it has drawbacks, especially if you're using it many times in one piece.

The catching floats method is not nearly as elastic as the Ladder Back Jacquard—it's about the same as doing nothing, in fact. It can be difficult to maintain a loose tension and it can still be slightly visible from the front side.

For these reasons I mainly use the “catching a float" method when I have an odd long float here or there within a fair Isle motif.

If you want to see my method for catching floats without getting your yarns in a tangle, check out my video.

How to Knit Ladder Back Jacquard

The Ladder Back Jacquard method is especially suited for sections of circular colorwork that have multiple rows of long-floats stacked on top of eachother or if there are especially long stretches between motifs that require carrying the unused yarn great distances (more than 10 stitches). Later in this post, I'll explain how to identify where to place the ladders.


Create the Initial Ladder Stitch:

a. Bring the main color to the front of your work first, then bring the float color to the front.

b. Do a M1L increase and...

c. Purl into the back loop with the float color. You can actually use any increasing method here, but I prefer either using the lifted increase or a M1L increase because they are invisible and anchor the ladder to the fabric.

d. Move both yarn strands to the back side at the same time.

This new stitch is the “Ladder Stitch". This extra stitch will live on your needle for all subsequent rows until you are done with the section that has long floats.


Continue the Ladder Pattern:

a. On the next row, work to the Ladder Stitch

b. Move the working yarn to the front of the work between the needle tips, then move the float color to the front, in that order. This keeps the ladder floating neatly behind the work. If you mess up the order it will be obvious after a row or two. You can fix it on a subsequent row by using a crochet hook to rework the layers.

c. Purl the Ladder Stitch with the float color.

d. Move both strands to the back of the work and continue working the motif as normal.

Continue working the ladder stitch on every row as described until the width of the float is 5 sts or less. I usually continue the ladder until the motif no longer requires a float in that column of stitches.


End the ladder:

a. On the next row, work to the ladder stitch.

b. Knit-2-together using the color indicated in your motif.

c. Continue working as normal. The ladder stitch should be invisible from the front side.


A few extra notes about the Ladder Back Jacquard technique:

  • • You can identify where you want to put your ladder stitch on the fly, but personally, I like to plan it ahead of time and mark my chart so that I don't get confused. You want to place your jacquard stitches so that you never have a float longer than 5 stitches, or 6 stitches max if you must. I've already done this work for you on the chart for my Arquette Pullover, which you can see below.
  •  
  • • You could do a knit stitch instead of a purl for your ladder stitch, but I think purling is easier and looks prettier on the back.
  •  
  • • The Ladder Back Jacquard technique is really best used when knitting circularly, but it is possible to perform all the same steps when working flat, just reverse everything when working the back (purl) side.
  •  
  • The Ladder Back Jacquard technique can enable you to knit intarsia motifs in the round, but this conversion is really only feasible if only 2 colors are used in one row.
  •  
  • • If your motif has many areas of long floats on every row, consider extending ladders beyond small sections to span the larger motif area. You could create an even mesh of ladders that covers the entire back side of your work. You would set up ladders evenly spaced—say 5 sts apart— on the first row of your work and then maintain all the ladders throughout, switching which color you knit the ladder with when the motif dictates a change, until you finish the last row of colorwork. On the back, the ladders would make long, tidy columns spanning all the way from top to bottom.
  •  


You can see this technique in action in my new knitting pattern, the Arquette Pullover, available on my site, my Payhip shop and Ravelry Shop. Using the Ladder Back Jacquard method is optional in this project, but I made it easy by including handy symbols on the color work chart to help you plan where to place the ladder stitches, which you can see pictured below.


I hope that you had fun learning and will incorporate the Ladder Back Jacquard method into your knitting projects.

Jan 31, 2020

Meet my latest design— Kuffel, a wonderfully cozy, effortless, swingy new pullover sweater pattern with all the knitterly details that a girl could want.


She's a top-down, seamless beauty. She's also a snap to knit, worked in Hudson and West Co's Forge yarn, a soft and lofty WORSTED weight wool. Pick up a digital copy of the pattern here at KnitDarling (via Ravelry), or a paper printed pattern at Hudson and West Co.


The pattern features 6 sizes, from 42" to 70" bust, and is intended to have a loose, boxy fit with about 8"-14" of positive ease for a swingy silhouette. Top-down construction makes it easy to adjust the length and fit as you go.


The sweater has a slight high-low profile achieved by working periodic short rows between the colorwork sections. The bold, graphic colorwork is super fun to knit from easily memorized charts. I've included some clever chart shenanigans that will make your beginning of rounds almost completely disappear. Just try to spot it—prominently displayed in two of these photographs! It's little details like this that make my knitwear-designer heart swell. Efforts that, I'm sure, you will appreciate as well.


Below is my initial design sketch. I originally intended for the colorwork to be in reverse-- dark pattern on a light ground. The gals over at H+W suggested it the other way around and I could not be more pleased with the results. The beautiful navy ground that you see in the photos is their “Midnight" colorway and the cream contrast color is their “Aspen" colorway.


I worked a tubular cast-on for the neck, and did a Kitchener bind-off at the cuffs and hem, which effectively looks exactly like a tubular bind off. I've written about this lesser known bind-off technique before--check out my post if you're unfamiliar. It's my favorite 1x1 rib bind-off and I think more people should know about it.


The pattern is part of Hudson and West Co's Deep Winter 2020 collection, which is chock full of cozy, colorwork stunners. I'm honored to be included in this talented bunch. My favorite design from the collection is Wildhaven by Jesie Ostermiller (@knitty_jo on instagram). I might have to make this for my husband!! (but no promises, Brian!)

I had pretty low expectations when I released my Cabled Dad Hat knitting pattern in 2014, but for four years it has remained one of my most popular designs. To date, I've sent over 10,000 copies to people all over the world—I can hardly believe it! It's been an inspiring, and humbling ride.

Today, I'm adding another twist to this adventure (cable joke, anyone?). I'm thrilled to announce the release of a coordinating pattern: the Cabled Dad Mittens. The pattern includes instructions to knit three unisex styles: classic mittens, fingerless mitts, and convertible gloves—choose your own adventure! The three styles are also at three skill levels; fingerless mitts easiest; mittens slightly harder; and convertible gloves the hardest because there are so many parts. See more info and pics on the pattern's page here.

It has been amazing to watch the Cabled Dad Hat projects proliferate on Ravelry over the past few years. I love looking to see what people are doing with my pattern, especially when they modify it into something a little different. Every once in a while, I stumble upon someone who has created a complete spin-off—a matching scarf, a mini hat for their daughter's doll, or something like that. This is one of my favorite things to find! To see that one of my ideas was a source of inspiration for someone else who designed something original makes me so proud!

My Cabled Dad Mitten design was created in that same spirit. I wanted to make a coordinating pattern that would be super accessible (hence three styles in three sizes). My hope is that someone will buy this pattern because they want to make one style for themselves, a different style for their boyfriend, and maybe yet another set for a gift.

I chose Magpie Fibers Domestic Worsted yarn to knit this design. This yarn line has a really wearable palette, which is always a consideration for me, but it's also a really great work-horse yarn, perfect for these mittens. It's 100% domestic Merino wool, soft yet sturdy, and has incredible stitch definition. I chose smaller size 5 US (3.75mm) needles to produce a dense fabric that will keep your hands very warm.


I hope you'll pick up your own copy of this super fun mitten pattern! Let me know what you think in the comments below.